Tuesday, December 20, 2011

Cob Oven Update #5 - She's Hot!


Yesterday i could not stand it any more so i built a fire in Craven, have i mentioned her name is Craven?, with the intention of baking some pizzas. I must say I was a bit apprehensive about getting her all hot and bothered. For all i knew she could totally collapse in a heap of mud... or explode into a million pieces. I built a fire out of old pallet wood and kept it blazing for 2 hours which i figured would be good enough for cooking a couple of pizzas. The fire door worked great at promoting good air flow while allowing easy feeding and tending of the fire. I used the blow pipe a couple of times to rev up the flames.

As darkness fell it decided it was now or never. I assembled the pizzas and (attempted) to put them in the oven :-p It was at this point that I began to learn a few things about cob oven in general and this oven in particular.

This is What I Learned:
  1. I need a proper peel- sometimes DIY is just not worth it. I found a restaurant supply on line from which i can get one for under $10.00. Ordering it next.
  2. Use a flat surface on which to assemble the pizzas - a cookie sheet with a lip does not allow one to effectively slide the peel under the pizza without messing it up.
  3. Do not put too many toppings on said pizza - they fall off with handling.
  4. Calzones are easier to handle that pizzas - and taste just as good.
  5. It takes a lot of foreplay to get Craven really hot - 2 hours of firing was not enough to heat her enough to even cook pizzas properly. I am guessing 3 hours minimum and 4 hours + to getter her hot enough to make buns in the oven, i mean, bake loaves of bread. This suggests that the abundant thermal mass in this oven will retain heat for a long time once it finally reaches maximum temperature.
  6. I need to start stockpiling lots of firewood - i have enough for probably one good firing. I am going to keep my eye open for construction sites, few and far between in this depressed economy. and start cutting brush around here that we've been planning to do for a while now.
While we did have to finish the pizza and calzone for a few minutes in the oven, they tasted great. Smokey, with a nice bottom crust. I look forward to the next time we get to fire her up!

Sunday, December 18, 2011

Cob Oven Update #4 - Tools of the Trade

The oven is essentially finished. After she dries out well i will put the final coat of plaster on her. She is about ready for her maiden voyage into baking though. i built a test fire in her last week and she breathes very well.

I have been making the tools i will need for the firing and cooking while i wait for her to dry out a little more.

These are the tools of the trade:

This the rough form of a peel. It will be used to place loaves of bread and pizzas in the oven and peel them out when they are finished baking.


This is called a scuffle. i made it from a paint roller extension pole, a nail, some copper wire and an old cotton sock. It will be wetted and used to swab out the remaining bits of ash in the oven before the loaves go in. The moisture left in the oven turns to steam and helps to create a nice chewy crust.


This tool is the rooker. It is used to scrape the coals and ashes out of the oven before the baking begins. I connected an ell bracket to a watering wand with a couple of screws to make this fine tool.


This precision tool is an oxygen delivery tube a.k.a. blow pipe. I will be used like a bellows to blow air into the fire to keep it burning evenly. I smashed the end of a 1/2" copper tube with a rubber mallet to flatten it out to provide a wide focused flow of air to the fire.


This is a fire door I fashioned out of a piece of aluminum flashing, a couple of ell brackets and a piece of copper wire. It serves as a temporary chimney improving the draft in the oven especially on windy days. Cool air flows into the oven along the floor and circulates up the the top of the oven and out the top of the door. When the wind blows the flow becomes turbulent and the wood does not burn efficiently. The fire door deflects the wind keeping the fire burning efficiently thus using less fuel to heat the oven.


This is the baking door. It is made out of cob with a piece of bamboo for a handle. Right now the damn thing weighs about 40 lbs. Hopefully when it dries out it will weigh a good bit less because it is very difficult to handle right now. It should keep the heat in well though.

We are very excited to fire her up and bake something soon. With the holidays fast approaching it may be next year before we try her out.

Monday, December 12, 2011

Cob Oven Update #3 - The Key to Cob is Community

Saturday before last the permaculture class came out to the Funny Farm to work on the cob oven. There were 14 of us all working together to make it happen. I gave a brief orientation about how a cob oven works, what the various layers are made of and where we stood in the process. We then divvied up the various task and got to work.

One group worked on the sand dome that would support the cob that forms the inside of the oven and is the layer that will absorb and retain the heat for cooking. 2 other groups started mixing and stomping the sand/clay mixture to make the cob. It was very exciting to experience how quickly we gelled into an efficient team to get the job done. Within and hour and a half we had completed the sand dome and applied the first layer of cob. Thanks to Brandy and Keri for bringing their group out the help.


Sunday i cut out the door opening and then took a break from cobbing to let my weary body recover. Cobbing is hard work :) And fun work too!

On Monday my friend Deanna came out to help me apply the next layer, the insulation layer. We built a large lip of structural cob around the door opening to support and contain the insulation. We mixed together clay slip (screened clay and water) and wheat straw and layer it over the whole surface of the oven in a 3-4" thick layer. This layer is not packed down so there will be air pockets that prevent the heat from being conducted out of the inner cob layer to the outside surface. After Deanna left i began to sculpt some of the features that will give the oven a Funny Farm flair. I added an eyebrow, an eye and the upper lip.

On Friday i covered the insulation layer with a layer of structural cob, clay/sand/straw. The straw acts like rebar giving the cob shear strength.

Yesterday i did some more sculpting using up the remaining cob i made on Friday. I added a lower lip and one cheek. I have determined that the oven is a female. Someone on Facebook asked me what her name is. She has not revealed that to us yet. All in its own time.

If the weather is good tomorrow i will finish up sculpting the rest of her features. After that we will let her dry until after the end of the year before we put the final plaster coat on her. This Sunday we will probably build a small fire in her to see how well she breathes and because i can't stand to wait any longer.

We are so excited about having fresh bread and other yumminess cooked in our own mud oven in the foreseeable future!

Tuesday, December 6, 2011

Register now for Our 5 Week Organic Gardening Workshop Starting in February

5 Week Organic Gardening Workshop W/ Duane Marcus


This is a hands-on workshop. Whether you are a beginner or an experienced gardener wanting to convert from conventional to organic methods, whether you have a sunny townhouse patio or a 3 acre lot, this class will put you on the path to taking control of your food future.

Week 1 -
Organic Gardening Foundations - Soil Food Web, composting, nutrient dense food and nutrient cycling
Week 2 -
Garden planning- what to plant, when to plant it and how to plant it
Week 3 -
Seed starting, soil preparation, cover crops, transplanting
Week 4-
Pest control strategies - putting Mother Nature to work to control insects, diseases and weeds. Insect i.d., biological controls
Week 5 -
Permaculture Strategies in your garden- Food forests, growing edible mushrooms, edible landscapes, rainwater harvesting, perennial foods

The classes will be every other Sunday from 1 - 4 p.m. starting Sunday Feb. 5th. Class dates are Feb. 5th, 19th, Mar. 4th, 18th, Apr. 1st.

Each class will be divided between classroom work and work in the garden


The cost for the workshop is
$300.00. Class is limited to 10 students

Online registration http://organicgardeningwkshp.eventbrite.com/
or mail a check payable to Robin Marcus to 4459 Allgood Springs Dr. Stone Mountain, Ga 30083

For further information-
email duanemarcus@mac.com

Classes meet at The Funny Farm 4459 Allgood Springs Dr. Stone Mountain, Ga 30083 30 minutes from downtown Atlanta

Friday, December 2, 2011

Cob Oven Update #2 - The Base is Complete and Ready for the Oven.

Today i finished the base for the cob oven.

The Insulation Layer
We want to retain as much heat in the thermal mass of the oven as possible. I made an insulation layer below the fire bricks that will be the bottom of the oven to keep the heat from being conducted into the oven base. The principle here is the same as with double paned windows. Air is a poor conductor of heat. First i placed empty bottles and jars on their sides. The insides of the bottles and jars are filled with air. Then I filled the spaces between them with a mixture of sand, clay and a good bit of straw with a little portland cement mixed in for strength. Straw is hollow so it is a poor conductor of heat as well.

The Final Layer That Will Support The Fire Brick.

I finished off the base with a 1 1/2" layer of structural cob which is just clay and sand in a ratio of 1 part clay to 2 parts sand. I determined the ratio by making test bricks a few days ago. I made same sized bricks using different ratios of clay to cob. 1:1, 1:2, and 1:3. I dried them in the oven using low heat. The 1:1 ratio brick shrank a lot. The 1:3 brick turned out deformed and slightly crumbly. The 1:2 ratio brick is perfect! That is the ratio we will use when we make the cob tomorrow.

Thursday, December 1, 2011

Cob Oven Update - base almost complete. Bourbon bottles almost empty.


Today i worked on the base for the cob oven. The base of the bench is finished. The oven base is at its final height but i ran out of materials to finish it. Good thing too, cause i am totally whipped!

Tomorrow i will get some more sand and fire bricks and complete the base. I also need to make some clay slip and start staging materials for the day of fun on Saturday.

Oh, yea, those bourbon bottles will be part of the insulation layer under the fire bricks. Looks like I probably need 1 more. Could be a long night of drinking ahead ;)

Tuesday, November 29, 2011

Root Cellar to Cob Oven - One Project Begets Another

We tend to do projects in fits and starts around here at the Funny Farm. We get an idea for something we want and it gestates for a while. Eventually something will trigger it's birth into the world. I started the base for an eventual cob oven several years ago. We wanted to build one for the fun of it. Cob-building with a group of people is a good way to build community. Cooking in it and sharing meals is also lots of fun. One of the main obstacles to building the cob oven was obtaining the clay soil we would need to make cob. I would have had to hunt it down somewhere. Load it on my truck. Then unload it. A lot of work. And, since the building industry is totally dead around here as a result of the collapse of the economy, finding it would have been hard. ( by the way, i can't say i am sad to see construction screech to a halt. Lots of raping and pillaging of the land has been avoided as a result)

Lately we have been more aggressive in our efforts to prepare ourselves for the time when the shit hits the fan. There are plenty of triggers out there that could set it off at any time now. To further our preparations i wanted to build a root cellar to store crops through the winter. Even though we keep our house at 60ยบ degrees it a little too warm to store things like garlic and potatoes which tend to sprout in our pantry. So, guess what? One project begets another! I dug out a space for the root cellar which generated the clay subsoil i need to build the cob oven. Yiipppeeeee!

Back in August i met Brandy Hall for the first time at our farmers market. She had just moved here from Asheville, N.C. Turns out she is a permaculture designer and teacher who, along with her partner Keri Evjy, is currently teaching a PDC (permaculture design certificate) course. They and their students are coming to the Funny Farm this weekend to help build the cob oven as part of the alternative building segment of their course.

Next week i will finish up the root cellar. I plan to build a roof over the cob oven to protect it from the elements. I plan to grow food on it too. I will put straw bales on it that i will inoculate with oyster mushroom spawn. Then, in the spring, i will plant vegetables and flowers in the bales. I also plan to mount a photovoltaic solar panel on the roof to power lights, (and a blender, you know, for cocktail-making). You see we have all kinds of building materials lying around waiting for something to trigger a project that they can be used in.

That's how we roll here at The Funny Farm.
I will post updates as we move forward with these projects. Gotta go check on my cob bricks baking in the oven :) Later!

Here are links to Brandy's (Shades of Green, Inc.) and Keri's (Healing Roots Design) websites.


Sunday, September 18, 2011

A Tribute to My Mom, Jane Funk Marcus. May She Rest in Peace.


My mom died this last Tuesday. She was 81 years old. She was one tough woman. She suffered through a heart attack, a stroke, lung cancer and finally succumbed to brain cancer with nary a complaint. She was happy through her last days, living in a morphine dream land without pain. She "visited" with her family and friends, went shopping, did her knitting and sewing, went to jail after she killed a man (no doubt he deserved it) and apparently witnessed my niece Erin and me burn a house down. That was my mom. I greatly admire her strength and grace.

She was a school teacher. She worked in the Head Start school program in the late 60's when it was first implemented in our county schools. She and her partner drove a van throughout the county finding children who did not have enough to eat or shoes and clothes to wear to school and helped them meet their needs so they would have the strength and pride necessary to get a good education. She founded the first pre-school program at the Presbyterian church she attended.

I spent several months dreading having to return to the bizarro town in which i grew up to attend her funeral. My childhood memories are not particularly pleasant. When the time finally came yesterday i was relieved to find so many people there who were her friends, family and colleagues who shared with me stories of how much fun they had with my mom and what great work she did over the course of her life. This is a post on the funeral home guest book (who knew there was such a thing :) from one of her first grade students from a long long time ago.
I have many great memories of Mrs. Marcus from Berryville Primary School, especially the cereal she gave us for afternoon snacks. Deepest sympathy to all of her family.
Many people have said to me this past week that they are sorry for my loss. I truly appreciate their expressions of love and concern for me and my family. However I do not feel i have lost anything. Her spirit now walks among those who came before and will remain in my heart for the rest of my life. Each time we use the crazy napkins she embroidered for me or i wear the weird sweater she knitted for me with the sleeves large enough to go around my legs or wrap myself up in one of the many many afghans she crocheted for me i will think of her and draw strength from her strength.

I am grateful that she brought me into this world and fed, clothed, sheltered and loved me until i was ready to face the world on my own. She was very fond of the hippie decree "go out and do your own thing". If she said it to me once she said it a thousand times in her special voice " do your own thing, baybay". And that is what i did. She was always so proud that Robin and i lived our lives as we saw fit, never compromising on our values. I got an email from a close friend of my brother Richard's the evening before the funeral. She told me that she had gotten to spend a lot of time with mom when mom came to visit my brother for Thanksgiving a few years ago while he was out doing his thing. This is what she said mom told her. She said:
she felt she had contributed to the world. Duane cares for the earth, Richard cares for the soul and Vickie cares for people. I did okay.
I was astounded and pleased that she uttered these particular words. My permaculturist friends will recognize them as the essence of the ethics of permaculture which guide us every day here at The Funny Farm . Care of the earth, care of the people and a fair share for all which i have always taken to mean caring for the soul of the earth and all of its inhabitants, animate and inanimate. My brother Richard is a classical musician and conductor. My sister is a sociologist who works with pregnant mothers and y'all know i am a crazy farmer.

The one thing all humans have in common is that we are all going to die some day. Dying is just a part of the circle of life. I will continue to celebrate my mom's life until my time comes and it is your turn to celebrate my life and pass it on to the next generation.

Deep peace of the Shenandoah river to you mom
Deep peace of the refreshing breeze to you mom
Deep peace of the shining sun to you mom
Deep peace of the Blue Ridge mountains to you mom
Rest in eternal peace mom

Tuesday, August 9, 2011

Much Ado About Beets or It's Fall Planting Time


I noticed in Johnny's Seed catalog last week that they have little graphs for each vegetable variety that show what soil temperatures are best for germinating seeds. I have never seen them before. I do not know if they are new or I am just unobservant.

This is extremely useful information, especially this time of year when seeds for fall crops need to be sown and it is still hotter than the hinges of hell. Take beets. In the past i have sown beets in the ground in mid to late September. I rarely got beets until the following spring because they ran out of warm growing days before the roots formed. Well, Johnny's little graph tells me that they germinate best when the soil temperature is 86ยบ. That is quite warm. I went out a little earlier with my instant read meat thermometer and did some research. Of course i have no idea how accurate my thermometer is so take this with a grain of salt (whatever that is supposed to mean). Bare soil in the sun was about 87ยบ. Soil under wheat straw mulch in the sun was about 82ยบ. Soil under the lima bean trellis where the sun never shines directly was about 77ยบ. Clearly there are differences depending on the environmental conditions. So the conclusion is that I need to plant my beets this week! The seed package says they will be ready in 55 days so i should have beets by mid to late October. Yiippeee! I had planned on planting carrots this week but carrots ideal soil germination temperature is 77ยบ so i will wait a while before planting them.

Today i planted several different brassicas in flats. Broccoli, collards, mustard, kale, napa cabbage. Self-seeded mustard came up in the garden several weeks ago so I know it will germinate fine. According to Johnny's graph, and my personal experience, broccoli likes cooler soil. Collards, napa cabbage and kale like it hot. I set up some shade cloth to provide some shade for the flats. They will germinate in 3 days then i will remove the shade cloth and watch them grow.

2 weeks ago i seeded arugula in the ground. It is up and growing well in a bed partially shaded by other tall plants. Komatsuna 'Summerfest' i seeded last week and it is up and doing well. Tokyo Bekana greens and Tokyo market turnips that is sowed on Sunday germinated last evening. That was quick.

Apparently there is a worldwide shortage of Hakurei Turnip seeds. I cannot find a source now. Johnny's rep told me it would be late this year before they would have any. If anyone knows of a source for it please share with me.
Thanks.

Thursday, June 23, 2011

Letter from a Neighbor - Summer Update from The Funny Farm


Yesterday a neighbor, whom we have not yet met, left this lovely letter in our mailbox. This is what it says:
Dear Neighbor,
just wanted you to know how much I enjoy your lovely garden. It always gives me Joy when I walk by. :) Thanks for tending to all the plants and making a difference in this world.
I have never had a green thumb but I am slowly starting to take care of a few small plants.

Take Care,
Srel (??)

We really appreciate that she took the time to let us know. It really warms our hearts to know that some people appreciate our work.

Here is what she sees.

Flowers along the street.


The view from the street towards our house.


Our intern Katherine weeding the green beans.


Winter squash trellis and cucumber teepees.

Happy Summer y'all. Keep on Growing!

Friday, June 10, 2011

Tomato Update- So Far So Good!


It has been over 2 weeks since we saw the first signs of the dreaded southern blight. We lost 4 plants. The rest of them are doing well, so far, after we applied the worm casting poultices. The plants are no longer wilting. They are putting out new growth. We harvested a few fruits from 2 plants which were the worst looking ones 2 weeks ago.

At the end of the growing season we will dig some of the up to examine the root system to see if we did indeed create a condition in which a replacement root system could develop.

Monday, May 30, 2011

A TOMATO EMERGENCY- Practicing Field Medicine

Our tomatoes were doing great; thick strong stems, dark green leaves, flowers blooming, fruit forming.... then one morning about a week ago I walked into the garden to find some of them wilting. Oh, crap, the dreaded southern blight is back! This is some evil stuff for which there is no organic remedy. It is a soil borne fungus that attacks the stem of the plant at the soil line. By the time you see the symptoms ( leaf yellowing and wilting of the stems) it is usually too late to do anything.

But I had to try. I do not want to lose my whole tomato crop in the front garden. The first thing I did was to treat the plants with Bacillus subtilis (Sererenade) a bacteria that attacks fungi. When I examined the plants to confirm my suspicions i noticed the presence of adventitious roots ( the little bumps) along the stem.
I thought that maybe i could make a kind of poultice out of worm castings by soaking them in water and packing them around the stem to provide a medium for the adventitious roots to grow into making a new root system above the dying one. I did that and one of the plants is beginning to recover. I can see new roots growing out into the worm castings. We are going to have temperatures in the mid 90's for the next 10 days so it will be a race to see if the plant can grow roots fast enough to meet its water needs in the heat.

The blight has spread to several neighboring plants. I placed poultices around them and pruned the wilted stems to reduce stress. Tomorrow I will put poultices around the rest of the plants in this part of the garden as a preventative measure. It is possible that there are beneficial organisms in the worm casting that will attack the blight and protect the remaining plants.

This stuff will attack beans, melons, peppers and many other plants. It will persist in the soil for several years. It will not survive being buried deep in the soil and it requires undecomposed organic matter to get started. Apparently grasses, i.e. rye or wheat, are not hosts so i will probably till deeply and plant a cover crop in the fall.

I will post updates about whether or not my palliative measures are working.

As a further precaution I got some replacement plants and planted them in a bed far away from the infected ones so I will have a later crop to take their places if this crap spreads.

Here is some additional information about Southern Blight from N.C. State extension. http://www.ces.ncsu.edu/depts/pp/notes/oldnotes/vg9.htm

Sunday, May 29, 2011

Eggplants Like it Hot and Patience is a Virtue


About a month ago, against my better judgement, I planted some small eggplant transplants in the ground. We had a week of unusually low temperatures and they just sat there sulking while the flea beetles proceeded to ravage them. Just what I expected to happen.

2 weeks ago i planted some of the same transplants into some large containers along the drive. They are 5 times the size of the ones i planted in the ground and unaffected by flea beetles. The soil in the containers is much warmer than the ground because the sun shines directly on the pots and is reflected onto the sides of the pots by the concrete drive.

I also planted some into 6" pots to grow out for transplanting. They are 3 times the size of the ones in the ground and are ready to go into the garden. Growing them to a large size and transplanting after the soil warmed up and after the first generation of flea beetles was over was my original plan. The large transplants will be able to withstand the next flea beetle attack and become established quickly in the now warm soil. They will be planted into the garden tomorrow.

Being in a hurry is of no benefit in the garden or in life. Breathe y'all.

Friday, May 20, 2011

Honing Our Skills to Grow More Food in the Same Space

Our production record keeping cycle runs from June 1st through May 31st. With 11 days to go we have increased our production from 1600 lbs. last year to 2600 lbs. this year. We grew an additional 1/2 ton of food, a 62.5% increase, on our little 1/8th acre micro-farm. We are very proud of that accomplishment. The total does not include the eggs our hens produced or the wild mushrooms we harvested throughout the year.

This year we have set a goal to increase our production to 4000 lbs. , 2 tons, a 53% increase. How will we accomplish that?

Maintaining the Soil Food Web
Over the past year we doubled the amount of stable humus in our soils. We accomplish this using 3 techniques:
  1. When crops are finished we cut the tops off at the ground level leaving the roots to feed the microorganisms in the soil.
  2. We leave as much crop residue as possible to break down right in the beds. This cuts out the extra step of having to compost it too.
  3. We maintain a mulch layer of either straw or leaves on the beds at all times. The mulch is slowly broken down to supply nutrients to the plants and add organic matter to the soil. The mulch also keeps the soil from drying out and makes great habitat for the shredders like pill bugs, ear wigs and millipedes as well as earthworms and spiders. You can dig anywhere in the garden now and find lots of earthworms.
We are continuing our soil testing and remineralization program. This is the single most important thing we do. We want to provide our plants with all of the nutrients they need in the right proportions to maximize production and to ensure that we are growing the most nutrient dense, health-giving, nourishing food we can for ourselves and our customers.
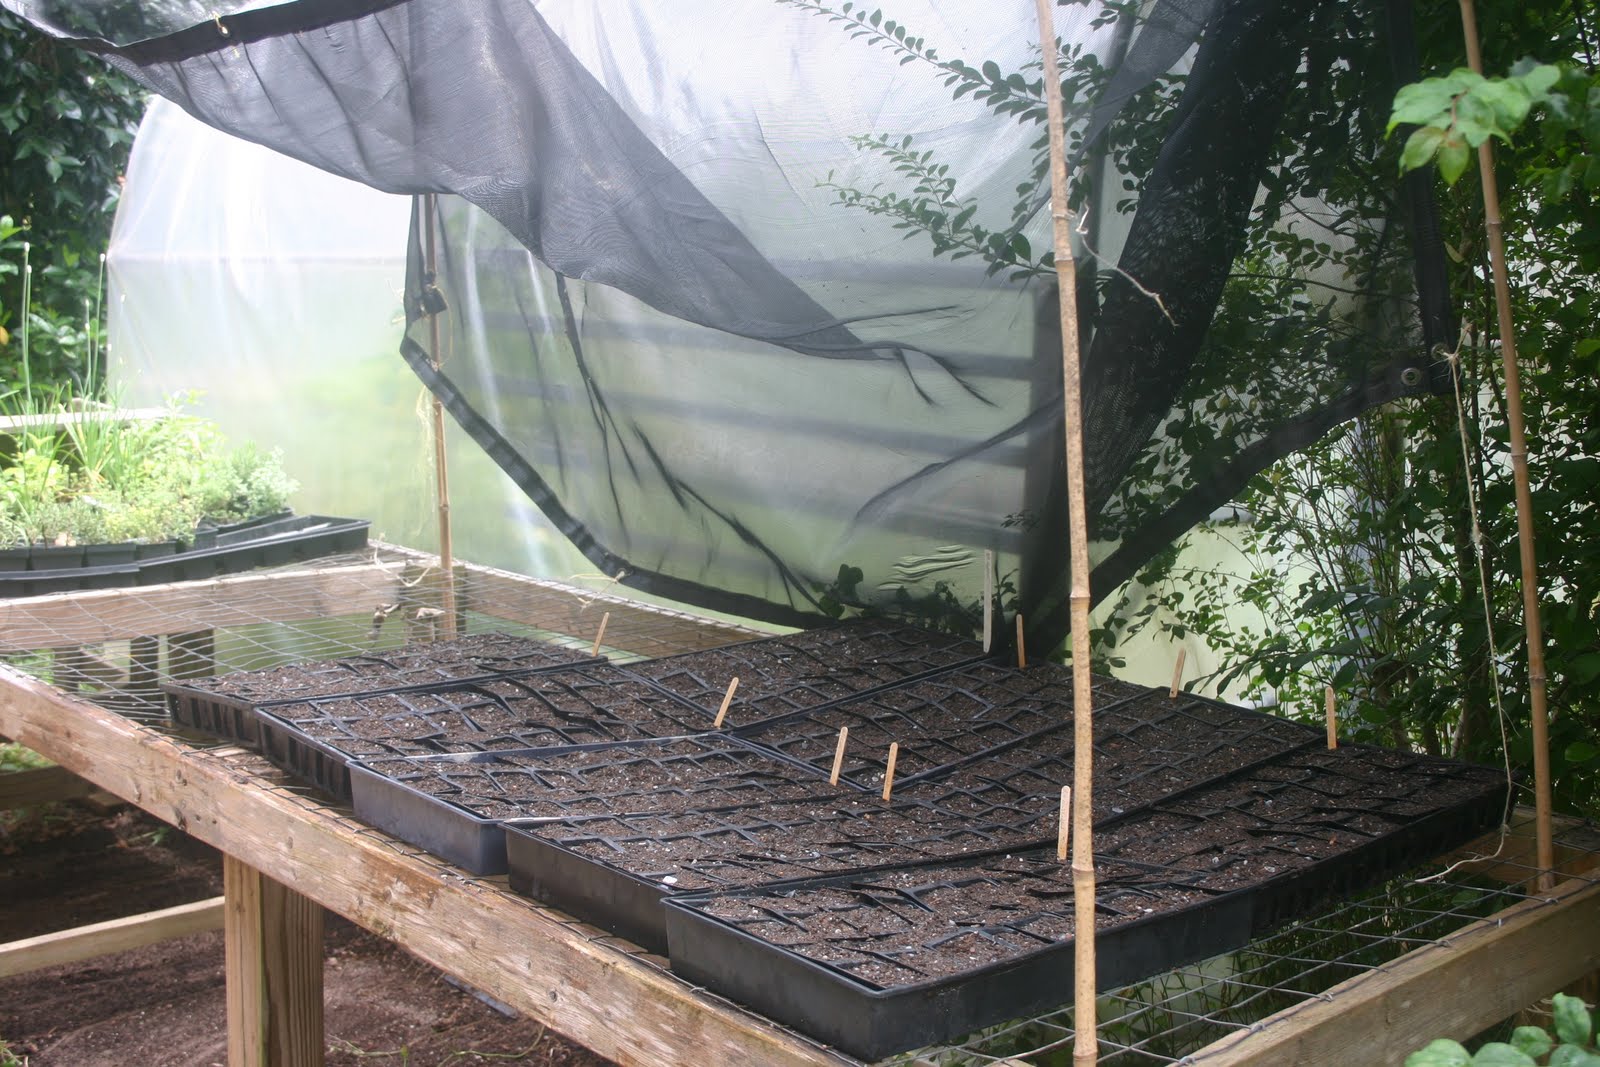
Sequencing and Crop Rotations
We are refining our crop sequencing to be sure we get the most production out of each bed. This spring we started many more plants in pots and got them in the ground as early as possible. We started a second round last week, mostly winter squashes. Next week we will start our corn to take the place of the potatoes that will be harvested in about a month. Then we are going to experiment with a second crop of zucchini and cucumbers which we will start in July to go in the ground in August.

Last fall we planted all of our greens at the same time. The thinking was that they would be mature by November or so and we would be able to harvest through the winter. Well our winter was much colder than usual so even with row covers we lost much of the crop. We did learn which varieties are more cold hardy than others, a good thing to know. This fall we plant to space
our plantings out. We will direct sow the earlier greens and start others in pots to be planted in November and even into December. The younger plants seem to survive the cold better. I know that seems odd but our experience and that of our friend Steve proves it to be true.

We will grow fewer beds of greens and more carrots, turnips and beets. We have learned how much greens we are able to sell through the winter, We want to have more variety available to our customers.
Maximizing our Space
If it is a vine it is going to grow up. Beans, cucumbers, squashes and tomatoes all grow on fences or bamboo towers with lower plants like peppers, bush beans, eggplants, basil, dill and flowers planted around and among them. In addition to getting more food per square foot this method helps with pest control by bringing in more pollinators, predatory insects and confuses the pests making it harder for them to find their targets.

We are growing in containers for the first time. We have some big pots left from our garden center days that we filled with a nice soil mix and planted with eggplants. The eggplants love warm soil and can tolerate drier soils that some other crops. They are doing much better so far than those planted in the ground which are getting eaten up by those dang flea beetles.

Expanding Perennial Food Producers
We continue to expand our perennial crops including sunchokes, berries, leeks and fruit trees into spaces not suitable for vegetable production. We are starting to get harvests from the trees and bushes we have planted over the past several years. Our single nanking cherry produced over 10 lbs. of fruit this spring. Our blueberries are producing a small crop this year. We added a second row of blackberries and doubled our sunchoke plantings. Our apple trees have a few fruits on them this year. We might get a few if we are lucky. In the fall we plan to plant some Asian persimmons, pears and a grape vine.

With the help of our 3 new interns, Deanna, Frances and Catherine (who are doing a great job so far) we can make this happen!